Want to find out how to repair / replace the glass front panel on your broken iPhone 3G? Read my complete tutorial to learn how.
Update: You can find a Norwegian version of this article at nrkbeta.no and you can find a hardcopy in issue 22 of Make magazine.
Like so many others I was unlucky, and dropped my iPhone and broke the glass screen. It doesn’t take much, I can tell you that. A 40 cm drop onto asphalt was all it took to transform my lovely iPhone into a cobweb of sadness. As you probably know Apple doesn’t repair this (at least not in Norway), so your options are a) to buy a new phone, b) to find someone who can fix it for you, or c) you can do it yourself.
dripod.no are one of the few places in Norway that specializes in doing iPhone repairs, and for this particular job they (well, he, actually) charge 1000 NOK, or about $140 for parts and repair, not to bad really. Unfortunately he has so many customers that he has decided to only do the repairs if people come to his place of work themselves. I live 550 km from Oslo, so that is not really an option, though probably still cheap compared to buying a new iPhone. But I like fixing things, so I wanted to try replacing the screen myself.
And so I did! And it wasn’t even that hard. Read on.
Tools and parts
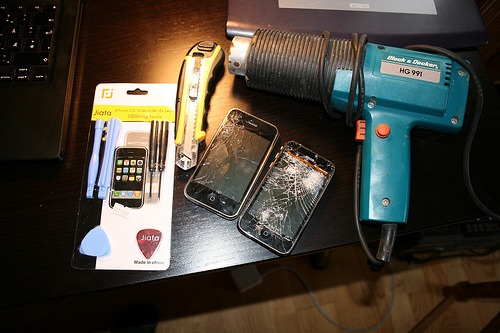
What you need
– A broken iPhone (glass broken, LCD still works). If you don’t have one, you could easily MAKE one :)
– New glass front panel / digitizer ($23.68 Deal Extreme : http://www.dealextreme.com/details.dx/sku.16101~r.60507495
– Tiny Phillips head screwdriver (I bought a kit from Deal Extreme for $3.00, the ones I had were worn down, www.dealextreme.com/details.dx/sku.11839~r.60507495. You also get some other useless plastic crap that really won’t help you at all).
– A sharp knife with a thin blade, for prying loose the screen from the silver frame. Update: Use a small suction cup instead!
– A heat gun or hair dryer (for melting the glue that holds the glass to the frame. A heat gun will probably give you more control)
– Double-sided tape (you can buy this pre-cut from the web (ifixit.com has it, see http://www.ifixit.com/iPhone-Parts/iPhone-3G-Front-Panel-Adhesive-Strips/IF137-006, or you can cut your own, like I did.
– A box or something to keep the tiny screws in.
– SIM tray removal thingy (AKA a paperclip)
– Scissors
– A tidy, fireproof, childfree environment.
Tutorials used
www.youtube.com/watch?v=uZl5FeZXTwA (stops before getting to the heat gun part, but good for dissasembly)
www.ifixit.com/Guide/Repair/iPhone-3G-Front-Panel/587/1
Remove SIM tray and screws
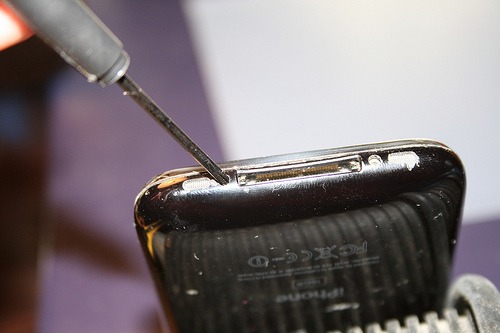
Find a paper clip and stick it into the the tiny hole at the top of the iPhone to pop out the SIM card tray.
Then (this picture) unscrew the two screws located at the bottom of the iPhone (close to where you insert your charger).
Gently pry the frame loose.
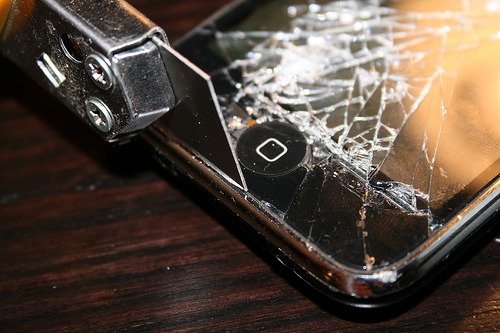
I had two iPhones, one to practice with and one to actually fix, but you probably only have one chance at this so be careful so you don’t damage the black rubber seal or the frame itself too much when you do this.
Update! Find a small suction cup to do this step, not a knife. It works much better. You can find one in stores that specialize in lamps and lightbulbs, the kind you use to remove the halogen lightbulbs works great.
Or: Place the knife blade (the thinner the better) in the crack between the black rubber seal and the silver plastic frame. You might have to use a little force, just dont overdo it. On one of the iPhones the screen came loose pretty easily, but on the other I had to try several times to get the blade far enough down to get the leverage I needed to lift the glass and frame up, which caused a little damage to the rubber edges of the frame.
Disconnect three cables
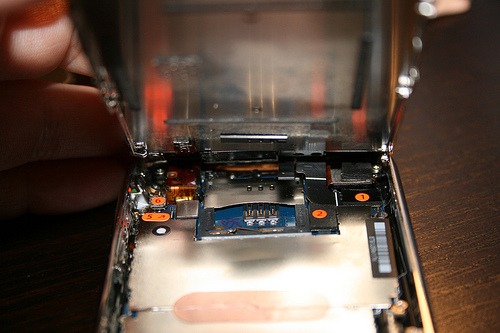
When you get the crack wide enough using the knife, you might want to use a guitar pick or another knife to wedge in then gently widen the gap. The screen + frame should lift up fairly easy.
The next step is to disconnect the three cables conveniently labeled 1, 2 and 3, located towards the top of the phone. Use the knife to do this. Be very careful, don’t use too much force. The cable connectors labeled 1 and 2 lifts straight up, but number 3 is a little bit different. On some iPhones the No.3 connector is a tiny white flap that holds the cable in place (on my iPhone this «flap» is black), and you have to gently lift it up. (see the video at the bottom of this post if you are unsure). Then the last cable should slide out easily.
You have now separated the glass+LCD+frame from the body of the iPhone. Sweet! Now try putting it all back together again before continuing, so you know how it should feel when you do it for real later. No, really, I mean it!
Closeup of flap
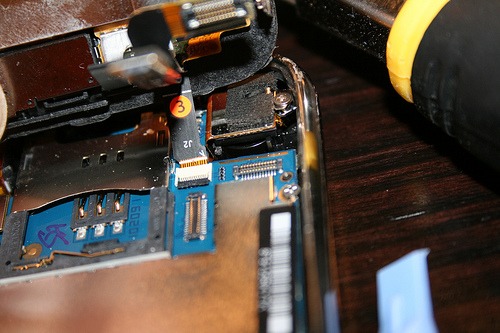
Taraaaa
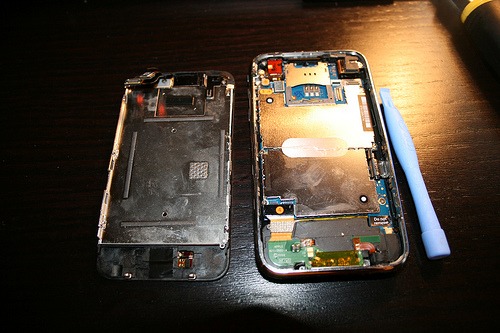
Congratulations, you have just voided your warranty! :) On the left you can see the backside of the frame and the LCD which you are about to remove.
Separate LCD from the frame.
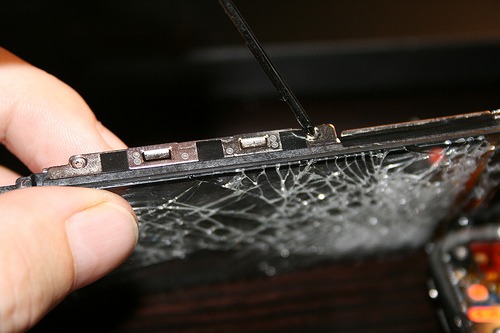
Or LSD as I like to call them.
There are three tiny screws on one side, and two on the other side, hidden underneath a piece of black tape. Unscrew all five.
IPhone 3G glass screen repair
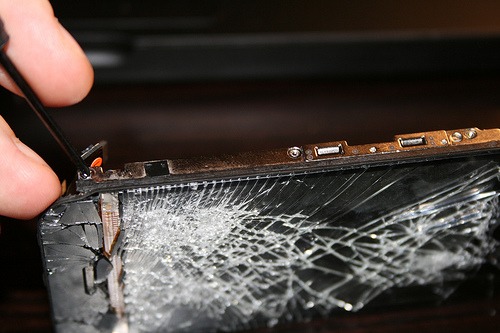
Remove last screw
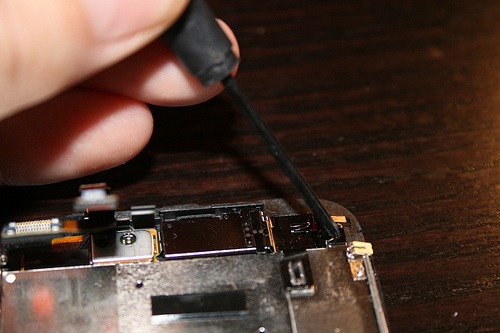
The last screw to be removed, I promise. This one is located towards the top. This screw and the five screws from the sides are all the same size, so you don’t have to worry about mixing them up.
Gently pry the LCD loose from the frame
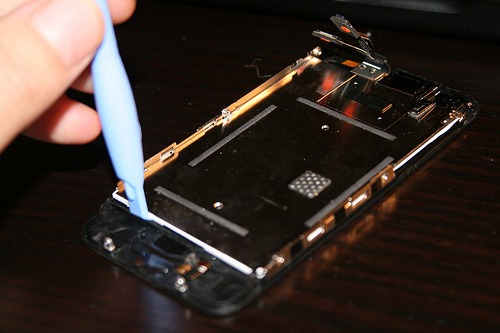
Put your knife, or similar thin instrument, underneath the LCD. Try gently to lift it, just be careful not to use too much force as you might break the LCD. You should be able to slide the LCD gently towards you. Don’t rush this step!
LCD and glass frame separated
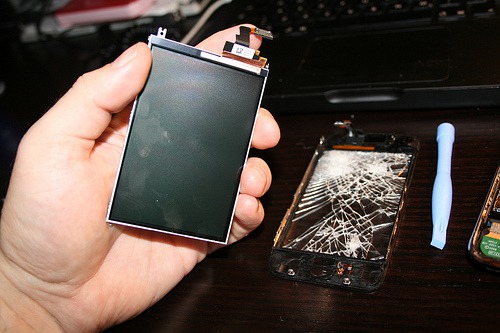
Woot.
Me and my broken glass
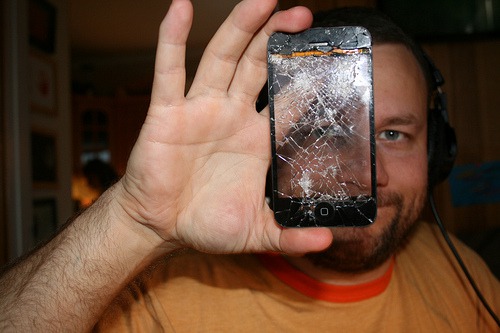
There is no feeling like destroying your own belongings (and then repairing them, preferably).
IPhone 3G glass screen repair
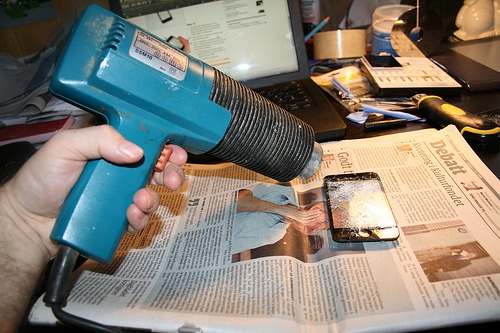
Heat gun time
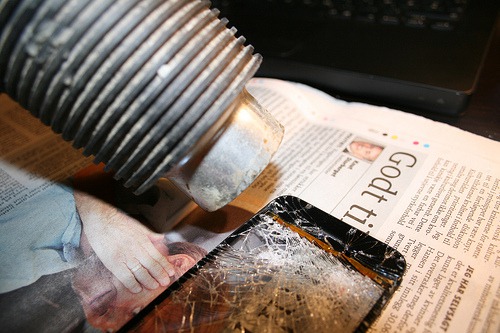
Put a newspaper or some other highly flammable material (yes, that was joke) underneath the frame/glass , and turn on the heat gun or hair dryer. You have to experiment with distance and time, just don’t get carried away. The danger here is that you might melt the plastic or rubber, or make the frame itself warp from the heat. As I’ve mentioned I had TWO iPhones, so I wasn’t that nervous about destroying one of them, so I wasn’t devastated when I noticed that the frame had changed it’s form a little. Luckily I was able to fix it, by heating the frame a little and bending it gently back into shape. I’m not a neatfreak, but I must say I was quite pleased with the final result.
Update: I found a video showing the heat gun step:
Use your fingers to gently lift the glass from the frame
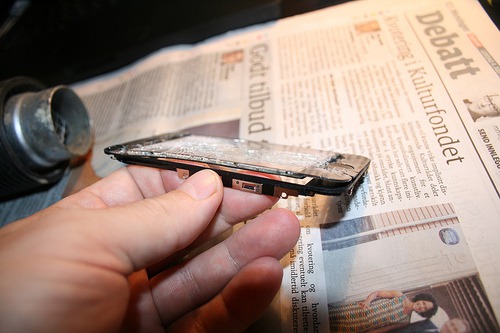
iFixit suggests that you start with the top left corner, but I have no idea why. I noticed that the glass had already loosened on the sides, probably from getting knocked lose from the fall, so I decided to start there. I was able to remove the middle part of the glass front panel quite easily, even without a heat gun. But the glass at the top and bottom of the panel was really stuck.
But by heating the glass in short bursts, I was able to find a way to heat the glass and the underlying adhesive enough for it to let go, and using my knife (and later a pair of tweezers) I gently removed all the small little glass fragments, one by one. It took perhaps a little under half an hour.
The most important thing at this point is to not damage the frame, so don’t use too much force. You must BECOME the phone, little grasshoppah! :) Use the heat from the heat gun to soften the glue/tape, and you will be fine.
One big chunk
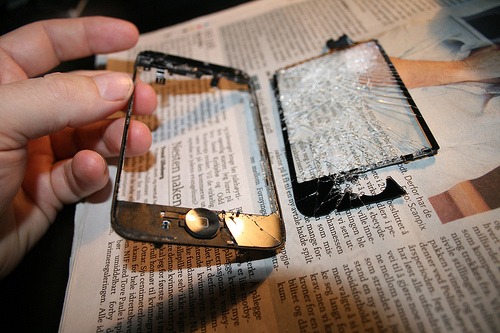
Depending on how broken your screen is you might be able to remove the entire front panel in one fell swoop, but you are more likely to end up with something like this.
Iphone 3G glass screen repair
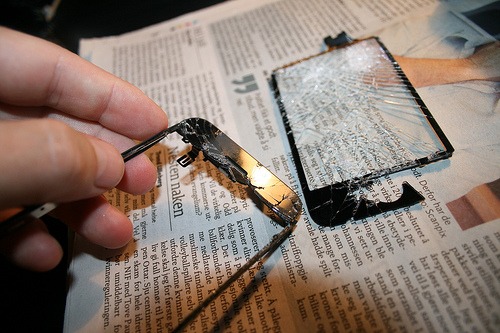
Iphone 3G glass screen repair
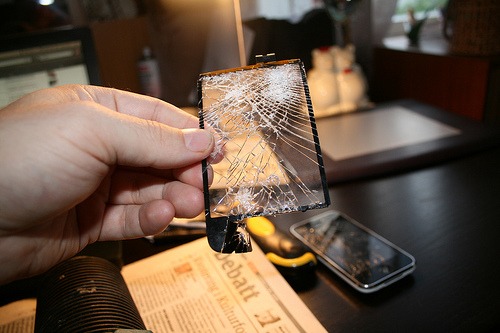
Reheat glass
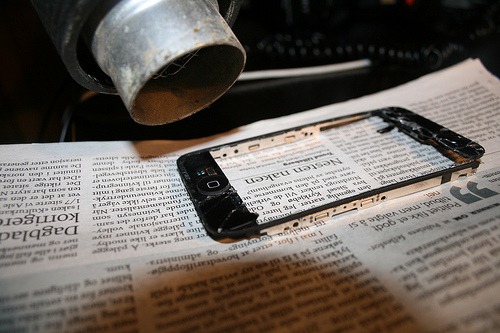
And repeat.
A closer look at the adhesive tape use on the iPhone
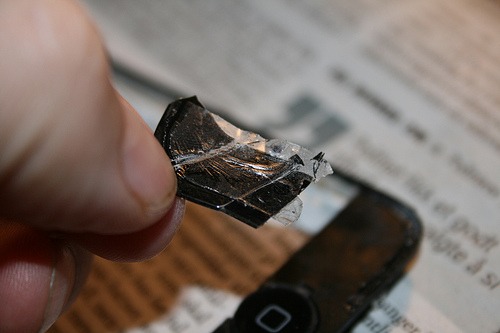
The glass front panel is fastened to the frame with clear double-sided tape on the top and bottom. Because there are alot of electronics placed in these areas (like the speaker and certain sensors), you have to cut the tape/adhesive film into shape. The part near the Home button is the easiest, while the top section is quite intricate.
Iphone 3G glass screen repair
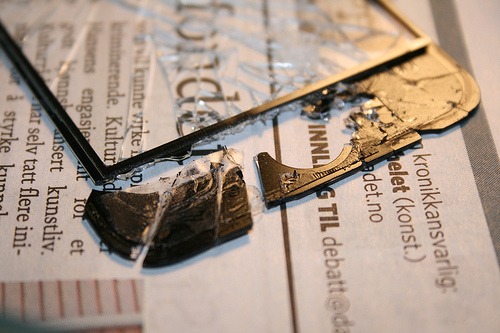
Almost done with glass removal
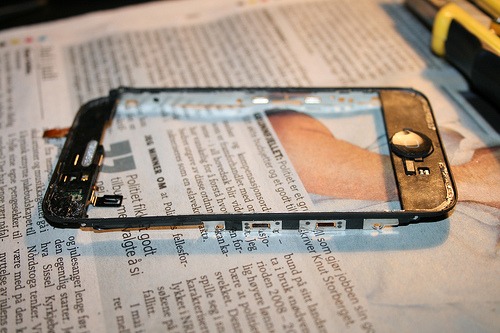
Use a knife or flat head screwdriver to scrape of as much as you can of the remaining adhesive. In addition to double sided tape, Apple seem to have used some kind of silicon or rubber cement to fasten the glass around the edges. If you have acetone or some nail polish removal you might use that to try to rub it clean.
I used a «q-tip» (cotton swap, not the Hip-Hop artist) and some electronics cleaner spray for this. It is of course important that the surface is as clean as possible before the next step, you should at least remove anything loose.
It is important that the new glass front panel is set at deep into the frame as possible. I felt a little lazy so perhaps I didn’t do this step properly, leaving my new glass raised a little bit higher than the original.
Cut your own adhesive tape from double sided tape
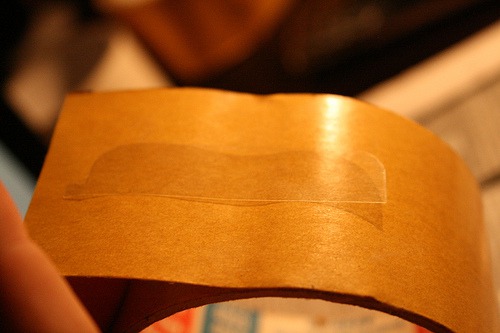
I actually had two rolls of double-sided tape lying around, but you should be able to find this stuff in any good hardware store.
I hope someone has the time to draw and share some kind of template for this, but it’s not hard to make your own.
You could of course order them pre-cut from the web, but if you are in Norway, like me, this takes time. Dealextreme.com doesn’t sell the adhesive kit, or I would have ordered it from them along with the digitizer/front panel, but you can get it on several other sites, like on ifixit.com : www.ifixit.com/iPhone-Parts/iPhone-3G-Front-Panel-Adhesiv…
This is how I made this step a little easier for myself:
The new glass front panel I ordered from Deal extreme was protected with thin translucent plastic, like the piece you can see in this picture, that matches the shape of the iphone perfecly. The plastic is a little sticky, so I just placed it on top of the protective layer of the double-sided tape, and simply cut around it.
Adhesive strips cut and placed
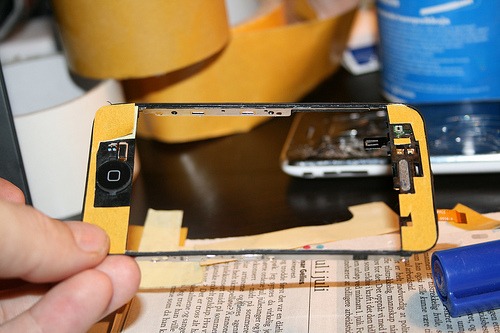
As you can see in this picture you have to cut shapes in the adhesive strips to leave room for the home button on one side and the speaker and various sensors on the other side. You basically want to cover as wide an area as possible.
A tip: For the top section with all its weird shapes, I put a piece of translucent plastic (a plastic bag actually) on top of the frame, and used a permanent marker to color the pieces I had to cut out. I then taped this on top of the double-sided tape, and went bananas with the scissors.
Put the tape in place and press down hard for a while. Then remove the top layer of the double sided tape.
Time to put the new front panel in
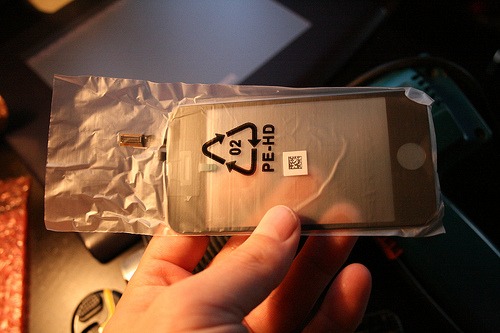
Wash your hands or wear gloves to avoid staining the glass too much (especially on the side that will be on the inside). Remove any plastic strips that might cover the glass on the inside, leave the plastic cover on the front side.
I didn’t bother taking any pictures of the next step, but it should be pretty self explanatory. You place the lower part of the panel in the frame, make sure you have it perfectly in line with the lower edge, and then carefully lower it down. Make sure the cables connected to the panel doesn’t get stuck on the tape, and use your fingers to make them go under the frame.
The tape is pretty sticky, but you will be able to move the glass a little bit back and forth as you adjust its position in the frame. When you are happy with it’s position, press it down hard. Then add pressure on one corner at a time, for about 20-30 seconds, allowing the glass to fasten.
And voila, the hard part is done! Now it’s time to reassemble the iPhone again.
Iphone 3G, good as new!
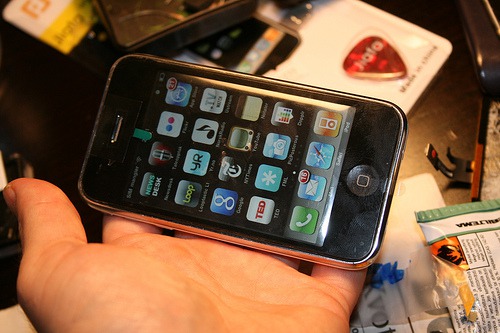
I skipped the reassembly in the tutorial, just follow the steps in reverse. First fasten the LCD with the six screws, then attach the three cables. Be careful when reattaching the cables, don’t apply too much pressure. If you break the connectors you are basically screwed! There is also a cable that runs in a loop, and you have to bend this loop so it points down towards the home button. If you don’t it will get in the way of the SIM tray when you put it back in later.
When the three cables are properly connected you can turn on the iPhone and test it without putting the panel completely in place. Test to see if everything works before you press the glass and frame completely in place (if you do you have to use the knife again to lift it off again, perhaps causing more damage to the frame).
Now, go forth and brag to all you friends, and feel pride in a job well done and money and environment saved!
Useful video
YouTube – iPhone 3G Dissection, Disassembly, Take Apart & Tear Down by DirectFix.com
Update 14.04.2010: I broke my screen again, and fixed it the same way, but on this new repair I’m having some problems with the screen becoming unresponsive. It was also harder to get the connectors to snap in place, but I don’t know if it’s because of something I did different, or if it’s related to a change in quality from the company that makes the replacement screen. I’m ordering a third replacement screen now for another phone, and if I’m getting the same problems on that one I will pull the link to the dealextreme page.
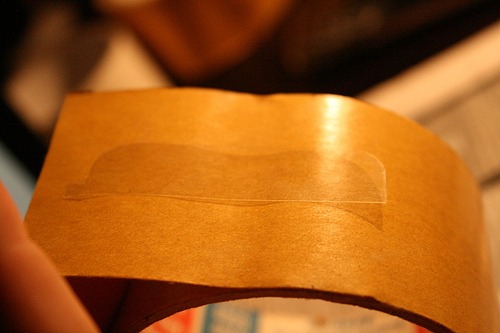

What an absolutely smashing tutorial! I actually feel a slight urge to break my unbroken iPhone…
Hahaha, do it, do it!
Hello Morten,
I am amazed from your excellent work …I have the same problem ,I broke the glass ,not totally ,like you ,I have some cracking lines only and the iphone still works fine…the esthetic part is the problem …My Iphone is a 2g ,older type and I upgraded it to 3.0.1. The question is if the construction parts are the same as with the 3G and if the glass and other things are passing.
I will be thankfull if you 'll share me some advices…
Thanks
Hi, I’m afraid that the 2G is quite different from the 3G and 3GS. I haven’t opened a 2G, but I’ve read a little about it and it seems like the touch panel (the glass) is glued in some way directly onto the LCD. But I know that Ifixit has a repaird guide for the 1gen iphone (which I believe is the same as yours), so take at look at that:
http://www.ifixit.com/Guide/Device/iPhone_1st_Generation
I had plastic wrap on my screen. It held the pieces together after it broke! I found a place (NOT APPLE) that fixed it for a little less than half of what Apple charged me (the last time I broke it!) I assume your directions will work on the 3G and the 3Gs? I don't know if I have the nerve to try it. I»m just hoping (LOL) that this phone will not slip out of my hands again!!
i did all the intructions…. but after all my hard work, my iphone did not come on!!!!! :( :( do you have any idea how to fix this?????
One of the three connecting cables might not be fastened properly. Or they might be damaged.
now its working thanks! :) BUT when i get a call the other person can hear me but i cant here them!!!! HELP PLEASE
Probably the same, try reconnecting the cables, nr 3 can be a little tricky to get back in.
I bought a screen from DealExtreme to replace my broken 3G. I followed your tutorial and the YouTube ones and it went over fairly well. I am having a problem now though: the sensitivity is horrible on the new screen, are you or is anyone else having trouble with touch sensitivity?
Brilliant! well done, followed everything, phone seems fixed. Instructions were spot on, best site i have found, and i have tried a few!
Where can i buy the parts?
I had broken the glass.
Bought mine from dealextreme.com, link in the top of the tutorial.
I also dropped my Iphone and there is a big crack in the top left hand corner and my silent button and volume button are broken as well and my on/off button.
How can i fix this?
For fixing the volume button and home button, I suggest going to ifixit.com
I used your guide to fix my screen. Worked perfectly. Thanks.
Your pictures are amazing clear. What kind of camera did you use?
Hey, thanks! I have a Canon 400D, these are taken with the cheap lens so I can’t get as close as I want to, but I have a macro adapter now, and also a better lens. Using the inbuilt flash as well. Nothing fancy, but the low end Canon cameras are actually really good and getting better. The 550D is a good bet I think, with HD video capabilities. I would get one of those now if I didn’t have the 400D. The 450D is also great, and getting quite affordable.
Thank you – the humour helped, but the step by step instructions were nearly perfect, and if you’re careful, and have a steady hand, it can be done. An extra TIP – if when you’re done, the iPhone doesn’t work, it has an Alt_Ctrl_Del type function where you can reset the phone. Hold the on/off button at the top, and the button on the front, for a couple of seconds, and it’ll «reboot» – mine worked, then didn’t, and then when I reset it, it’s as good as new. Also, be careful not to get anything b/w the plate and the glass when you’re re-assemblig – I got a tiny feather in there (somehow), and had to pull it apart and re-do it!!!!
Hm, thanks for the reboot tip, I didn’t know that. Useful if the screen has no output at all, I’m sure. I turned the phone off completely before starting, but I also turned it on to test during different points. I left out my own fubar actually, where I forgot to remove the plastic protective film from the backside of the glass, having to redo the tape cutting step! Live and learn as they say!
The girl at the AT&T (where I took the iPhone after I had no power at all!!) gave me that tip, and said she «resets» her iPhone every couple of weeks – sort of like dumping cache, etc etc
thanx for your guide. Did go to Ifixit once or twice, for advice about uncoupling the 3 connectors, but your guide is much more likeable and human.
Still have to find out how to save or replace the tiny rubber seal. Deal with that next time. Also, when using double-sided (carpetlaying?) tape, next time I’ll use a double layer. Apple’s tape seems to be a bit thicker.
Anyway, everything went in 1 go, so that’s a result.
Ordered the part from DX 3/4 weeks ago, no sensitiviry issues.
Glad you liked it :) Yes, those three connectors are really tiny, and I found it hard to explain in English how to do it. I think a macro lens of some kind is needed to get close enough to get proper pictures.
about those connectors: I found that No.1 just popped out when I flipped the screen assembly into the vertical. No.2 needs to be spudged (or squigled or whatever) straight up (like no.1). You can’t slide it towards the top like I tried first. For No.3 you need to lift the tiny white «holding bar» at the bottom (very, very gently) and slide the flexible connector thingy out towards the top. No.3 is definitely the most difficult to get back in, I found it doesn’t need to go in all the way, you can leave about 1 mm of the copper/PCB visible. I spent way to much time trying to force it all in.
This is amazing.
You have done an excellent job – First, due to the fact you didn’t panic, didn’t throw money away and just «did the job».
Thanks for sharing with us and writing this tutorial for our use.
Thank you Yoni, much appreciated :)
Thank you, Morten, great tutorial, funny writing. I am a proud owner of a grand new looking iPhone 3G*. The front panel and digitiser from DealExtreme.com are responsive and just as good as the original, a great deal for 24$, including free world-wide delivery from Hong Kong!
It was uttermost difficult to locate the hair dryer my sister gave me to Christmas fifteen years ago. Otherwise, be careful when opening the mother of all smart phones, I will have to use the head set the rest of its lifespan: The ribbon cable 3 is now broke, because I thought I did not need a tutorial just to open the phone. (I did). If some of you ever want to make a tutorial how to replace the ribbon cable 3 and/or motherboard connector, I’d be happy.
The rest was easy peasy. The frame is a little bit fragile, I used the hair dryer for some seconds on full power, then used a sharp knife to see if the glue had melted. It was a scary experience, but the glass was actually easily removed. Just don’t overdo the heating.
The flickrering garden lantern looks promising, too. Maybe next year.
* The double sided tape does stick as good as it should, the front panel is a little bit slack, especially on the sides where there is no tape. Maybe some kind of glue could be used instead?
I TOLD you to be careful! You should never mix iphone repairs with booze :)
The second time I broke the glass on my iphone (oh hell yes) I bought the sticky tape kit from ifixit.com. I doesn’t cost that much, so I ordered 3 sets. Who knows how long my glass will last THIS time :) The tape from ifixit is a bit thicker than the double sided tape I used the first time, but seems much stronger.
I just spent over an hour replacing my iphone screen with the kit from directfix. i waited about two weeks for the delivery (int’l shipping)… used a hair drier instead of heat gun. there are a few small tidbits of info missing, but a little common sense is required. i’m very happy with the installation. btw, i didn’t get the little screwdriver, which i highly recommend. i just got the tape, screen, and case opener. like magic… with shipping and everything i ended up paying around $50, instead of $125 for fixing it locally… and am extremely happy with the results. now i can sell my newly-mended 3G phone and get the 4G… in a few months!
Great tutorial and thanks to those for the tip on rebooting… had a few nervous minutes worrying why I couldnt get a screen but sure enough… held the power button for ~30 secs, reconnected and powered on fine :-)
Hi, I noticed that I am able to lift the corner of my broken glass without taking the phone apart. Why not just pull the glass off if there is nothing but tape holding it to the frame?
If the glass is broken you have to replace it, and to do that you have to disconnect the ribbon cable that connects the digitizer (which is part of the new glass you buy) to the motherboard. But if you only want to remove the glass and never use the phone again, then yeah, sure. :)
I read at the end of your article that you were having a problem the second time around getting the same results as previous. I am experiencing the same issue I think. I’m having problems getting the connectors to fit, a close inspection reveals slight differences in the two. The ribbon connector no. 3 works fine but no. 2 and no. 1 are not matching and will not stay connected. Are there two versions of the 3g? Any insight would be greatly appericated. Ty for your time.
It is more likely that there are different manufacturers for the spare part. The fit on my second repair was really tight, it felt like the connector wanted to pop out really bad, but I was able to make it stick until I could close the phone up, but I had to use a bit of force as it seem like the ribbon cable was too long. It could also be wear and tear on the connector itself.
One other possibility is what I experienced, you may have mistakenly received acreplacement part meant for a 3GS. The parts are nearly identical and will fit but the #2 connector will come loose. If you can keep it in place, the phone will work but the controls on the display will not be properly registered with the touch screen. For example, to press a button on the display you may actually touch the screen a quarter of an inch or so away from it in one direction or another.
The digitizer is from an 8 gb and the LCD is the original from the 16 gb phone I’m repairing. The 8 gb match perfectly in all aspects. I’m under the impression from many retailers that one size fits all in reference to the digitizers and glass. So by proxy if I get a good digitizer from another iPhone it should fit all other iPhones bc «one size fits all». I’ve tried now with two diff 3g 8s good glass to replace a bad 3g 16. It just won’t work the diff in pin connectors is plain as day. I might be asking the wrong person I guess. I’m a compitent iPhone repairer. Just thought u might have insight I wasn’t prevy to.
Hm, I never thought about that. I have the 16gb version, and the connectors from the dealextreme digitizer/glass linked to from this post fits when it comes to the connectors, but as mentioned the ribbon cable seems to be a bit too long. It fits, but I had to squeeze it in place.
DONE IT BUT NOW I CANT GET A SIGNAL, IT JUST SAYS NO SERVICE…HELPPPP :(
I believe the primary antenna is located towards the bottom of the phone, where the usb goes in. If you take a look at Step 18 here http://www.ifixit.com/Teardown/iPhone-3G-Teardown/600/3, it could be that the connector labeled 4 has come loose when you worked on the phone. Check that and all the other connectors you loosened (1,2,3).
I’m also having problems getting the connectors to snap in place. Connector 2 does not snap in and is visibly different from the original connector. Any advice?
I’ve had some problems with the no. 1 connector on my phone, but never with no. 2 ( check http://www.ifixit.com/Guide/Repair/Installing-iPhone-3G-Display/574/2 to see what is what ), No.2 has always fit really snug for me. Perhaps one of the tiny pins is bent?
I just tried to repair my friend’s iPhone screen, and everything went very well except for Connector #2.
Morten and McLean, from comparing my phone and hers, it looks like there is a bar in the middle of connector 2 that is slightly larger on hers than mine. The replacement screen had the slightly smaller version so it never clicked in properly.
I was able to hold it down and get partial function from the screen and home button, but never consistent or over the whole screen.
Hm, thats kind of bad news. Did you order the part from Dealextreme that I link to from this article? Can someone else confirm that it doesn’t fit anymore on the 3G?
the part was purchased from AX Micro Solutions.
My 3G had the right fit and was marked Copyright 2008, while my friend’s 3G was market 2009. I wonder if they tweaked the design.
Just never able to click in for a secure connection.
That sucks, perhaps you can ask them for a replacement? Or order the Deal Extreme versions. A couple of people have mentioned that the Deal Extreme version also sometimes doesn’t connect properly, or has to be forced. I experienced that myself the second (!) time I broke my screen, but that was because the ribbon cable seemed to be stiffer and had to be bent quite forcibly to stay in place.
just finished replacing my screen. there is now some crazy multi-colored, multi-lined graphic strip down the left hand side and i have lost my home button entirely…i have re-disassembled and (again) reassembled it several times, to no avail. i’ve taken a picture of it and emailed it to myself. if this might help you (possibly) help me figure it out, i would be eager to forward it to you and eternally grateful for your input. =]
LCD: Can you upload the pic somewhere on the web? Are you sure that the LCD didnt have those stripes before you took the phone apart? Perhaps it’s damaged?
The home button: There is a risk of damaging the home button when blasting it too close with the hot air gun, you could damage the soldering for instance. Easiest way to change the home button and circuit is to get a complete top (digitizer, glass, home button, etc). Or you could take a look at this Instructable: http://www.instructables.com/id/Fix-a-Broken-Home-Button-on-iPhone-3g/ to see if you find any useful tips and hacks. Looks like a good place to start.
My #2 connector is giving me the same issue…it fit’s really loose, then pops off. If I hold it down tight, it works. It just won’t stay connected. Every other part of my repair went easily. Would crazy glue do it? Any other ideas?
Glue sounds very risky!
Nice one Sir….You just saved me £50.00!!
Easy to do. Just need a little patience, good light and most importantly….a cold beer to keep you company!
Beer is the most important ingredient :)
Hey Morten,
will this tutorial work for a 3GS iPhone? just wondering if I should buy a different part and find a different tutorial.
Thanks, love your detailed report!
I suggest ifixit.com for any other model than the 3G. From what I read the 3GS is svery similar, but I don’ t have any experience replacing the screen on it.
The replacement for a 3GS is almost identical to the one above. I found no noticeable differences while doing mine and the instructions above.
# 2 wire is popping out. You have the wrong board. My iPhone guy just did this to my phone.
Hi, I am having difficulty removing the screws. I was able to remove only two screws but the others just won’t budge. I’ve tried using a #00 and #000 size phillips screw driver. Is there any advice on how I can get the screws off?
I used the little kit from dealexstreme, and I didn’t have any problems getting the screws lose, but my hands are pretty strong. There is a little bit of glue on the screws that prevents them from vibrating lose over time, so when you unscrew thew it feels like they are totally stuck. But as you apply force the glue should suddenly pop and it should be easy to unscrew. Just be careful so you don’t damage the screw itself.
You could also try using a pair of pliers to turn the screwdriver. Just take care it doesn’t slip.
I tried doing this, but when I used the suction cup to remove the screen, it was only the glass that came off, not the whole metal back thing.
I really don’t know what to do right now.
How to I get it off to do it properly?
Wow, that is strange, I don’t understand how that is even possible! The black frame should definitely come out with the glass, the glass is glued to the black frame pretty good. You could do what I did before I read about the suction trick, and use a small flat screwdriver and wedge it between the black rubberized frame and the plastic silver frame, and gently pry the black frame out. Remember to unscrew the two screws first, and be very careful so you don’t break anything.
My ribbon cables #2 and #1 will not clip into place any ideas?
Can you compare them to the original cables, see if they are visually different in size? Are you able to get the original cables to clip into place?
great tutorial thank you. only problem is now ive turned it on, when i make or receive calls i cant hear the person unless i put them on speaker phone. Any idea why this would be?
Open up the phone again a look for a connector that is around the home button, it might have come loose.
I have to say I have followed each step with detail and it all seemed to easy as when I have fitted my new screen and put the phone back together the screen isn’t responsive to touch? Any help would be very much appreciated??
Hey thanks for the tutorial! But after i completed the installment only the left side of the screen is responsive to my touch. The entire screen shows, but not the entire screen is touch responsive. help?
i dropped my iphone 3gs
good thing is front glass or screen didnt shatter and phone is working fine
bad thing front glass became loose i think lost adhesive and now i have lots of dust particles under glass
so question is should i just pull the front glass out without any dissambly , clean it and stick it back
or do i have to do complete deassamblying ??
I’ve follow this tutorial an it went well!! But I have 2 problems!!! Conector #3 feels a little bit loose!!! And the vibrator doesn’t work! I’ve notice that wend you put the screen back stops working! After triying to fix the vibrator problem the screen stop working… It went full white then black stripes appeared and then…. It stop working!!! I al ready buy another one!! So do du think that connector #3 is damage? Please let me now!!
The #3 cable is a ribbon cable that slides inward at a difficult angle and can easily pop out when re-assembling. This cable seems to be the one that communicates your finger-touches to the controller. On my 3GS model, there is a white latch that flips up; you insert the ribbon on the opposite side of this latch, perhaps using tweezers as a guider; once it’s all the way in, flip the latch back down. The other cables will snap into place, but they must be aligned correctly for the snap to really fix them in, and that’s simply trial-and-error.
OMG. I’ll ask my dad to do this. I’ve been crazy looking for a new panel.